PRE-WRITING STROKES
There are several basic strokes that children need to draw before expecting them to write. In order of development they are a vertical line, a horizontal line, a circle, a cross, a square, a diagonal line, an X, and a triangle. These skills can be nurtured through some of these multi-sensory activities.
Sensory Tub – Fill the bottom of a plastic tub with sand, rice, salt, grits, or another sensory material. Children can practice making strokes, shapes, and letters in the tub.
Hint! Make sure the children wash their hands before and after using these materials.
Shaving Cream – Squirt shaving cream on a laminated table top or lunchroom tray. After free exploration, encourage children to practice making strokes and letters.
Highway Shapes – Download highway shapes, letters, and numerals free at makinglearningfun.com. 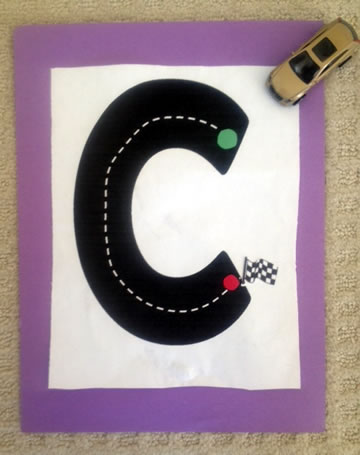 Laminate or place in clear sheet protectors. Children can use toy cars to drive over the lines.
• Let children trace lines with a dry erase marker and then erase.
• Have children roll play dough and put it on top of the lines.
• Use a green dot to indicate where children should begin. Put a red dot or checkered flag where they should end.
Play Dough Book – Use file folders to make this book. On one file folder write “Can you make lines?” and draw lines. On another folder write, “Can you make curves?” and draw curves. 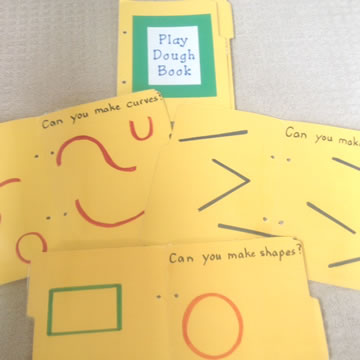 Write “Can you make shapes?” on another file folder. Make other objects and shapes for children to reproduce on additional folders. Laminate. Hole punch and bind the folders with book rings. Let children use play dough, Wikki Stix, and other materials to reproduce lines, curves, and shapes.
Play Dough Plates – Draw strokes, shapes, and letters on clear plastic plates. Children can roll or cut play dough and place it on top of the plates.
Connect the Dots - Make strokes with dots on a photo sheet. Children can connect the dots with a marker, Wikki Stix, or play dough.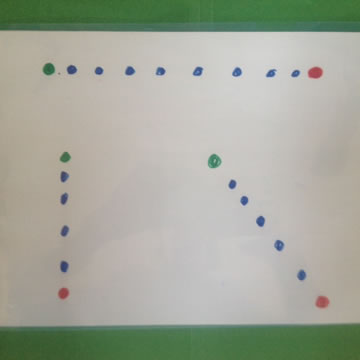
• Draw dots on paper and then insert in clear folders or sheet protectors.
Lotty Dotty - Use a marker to make dotted letters. Put a drop of glue on top of each dot. Dry. Children trace over the dots of glue with their finger. 
Hint! Make the first dot green and the last dot red to indicate where to start and stop.
Plastic Needlepoint Canvas - This plastic material that looks like screen can be purchased at most craft stores. 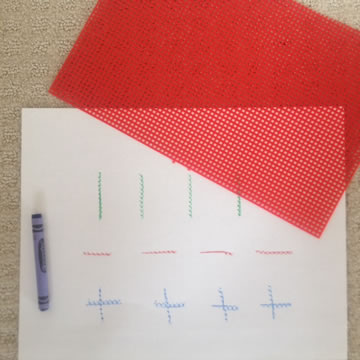 Place a piece of paper on top and then make strokes and shapes with a crayon. Press firmly for best
results. Trace over with your finger.
Rub Overs – Make shapes and strokes with water soluble makers. Trace over the letters with white glue. The marker will be absorbed into the glue to create a raised letter. Children place a sheet of paper on top and rub with the side of a crayon.
Taa daa!
Rainbow Writing – Make strokes with a black marker. Children take different colors or crayons or markers and trace in multiple colors.
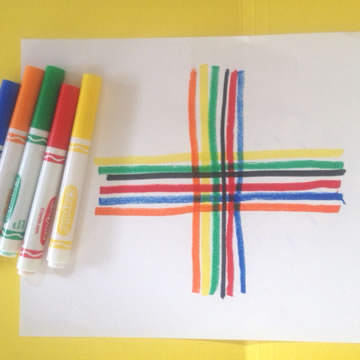
• Make giant pre-writing strokes on chart paper and tape to a wall. Encourage children to work together to make “rainbows” from the shapes.
Pretzel Power - Give children pretzel sticks and pretzel twists. Have them
use the pretzels to reproduce strokes and shapes.
• Demonstrate how to nibble a pretzel twist to make a circle.
Disappearing Shapes – Give children a small cup of water and a strip of sponge. They can dip the sponge in the water to practice strokes on the board. As the water evaporates they will “disappear”!
Sidewalk Chalk – Provide children with chalk so they can practice strokes, shapes, and letters on paved surfaces.
Flashlight – Turn off the lights, give children a flashlight, and let them make shapes and letters on the wall.
• Let them lay on their back and practice making strokes on the ceiling.
Copy Cat Cards – Make pre-writing strokes on squares of cardstock similar to the ones shown.
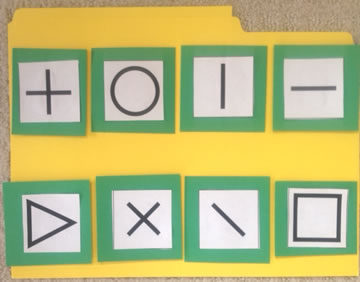
Children can look at these cards and try to “copy” the strokes in the sensory tub.
Horizontal, Vertical Song
(Carrie O’Bara and Terri Miller)
(Tune: “Where Is Thumbkin?”)
Horizontal, horizontal, (Forearms held up horizontally in front of chest.)
Vertical, vertical. (Forearms bent at elbows to form right angles.)
Horizontal, horizontal,
Vertical, vertical.
Then diagonal, then diagonal. (Right arm slants in front and then left.)
Add a curve. Add a curve. (Make a “c” with right hand and then left.)
Then diagonal, then diagonal.
Add a curve. Add a curve.
Next Page
 Laminate or place in clear sheet protectors. Children can use toy cars to drive over the lines.
 Write “Can you make shapes?” on another file folder. Make other objects and shapes for children to reproduce on additional folders. Laminate. Hole punch and bind the folders with book rings. Let children use play dough, Wikki Stix, and other materials to reproduce lines, curves, and shapes.

 Place a piece of paper on top and then make strokes and shapes with a crayon. Press firmly for best
results. Trace over with your finger.
