I know a scientist, (Hold up index finger.)
And you can be one, too! (Point with index finger.)
Here’s the scientific method
So you’ll know what to do.
First you find a question. (Hold up one finger.)
Just take a look around. (Pretend to look around.)
What is it that you want to know?
Now you write it down.
Next you make a guess— (Hold up two fingers.)
It’s called a hypothesis—
About what will happen
When you do your tests.
Now experiment, (Hold up three fingers)
Observe it, write it, too. (Hold up four fingers.)
You’ll need lots of data
To show your guess is true.
Draw your conclusions. (Hold up five fingers.)
Look into any doubts.
Then tell everybody
What you’ve found out!
Activities:
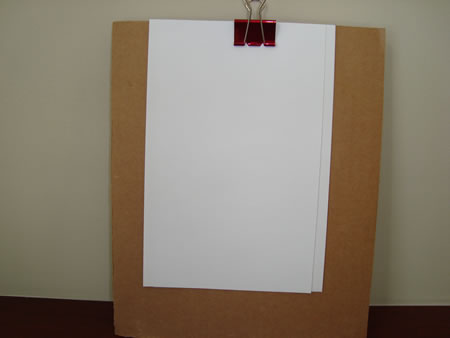
*Let children make individual clipboards for gathering data. You will need corrugated cardboard (recycled, of course!) cut into 12” x 9” rectangles. Attach a butterfly clip to the top of the cardboard to hold paper. Children can decorate their clipboards with markers and then use them to sketch pictures, write observations, do surveys, take notes, etc.
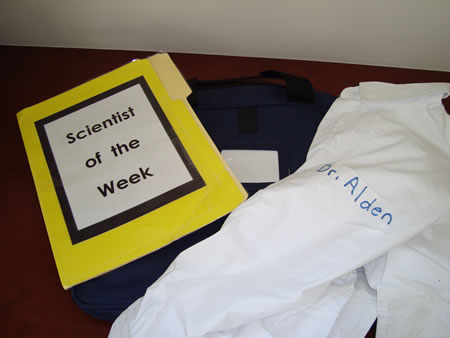
*Ask children to bring in an old white shirt (or you can pick these up at a thrift store). Cut off the sleeves and write “Dr. child’s name” on the pocket with a magic marker. When children are “scientists” they get to wear their lab coats. Call each child “Dr. ____” and use the scientific name for whatever topic you might be studying. For example, when learning about insects you could call the children “entomologists.” When you study rocks they could be “geologists.”
*Use an old backpack or computer bag to start a parent/child project called “Scientist of the Week.” Put a notebook, a list of simple science experiments, protective goggles, a lab coat, magnifying glass, magnet, etc. in the bag. Write a letter to parents explaining that each week a different child will get to be “Scientist of the Week.” That child will take home the bag on Monday and she will have several days to prepare and practice a science experiment that she can demonstrate to her classmates on Friday. After students have presented their experiments, their classmates can write about them in their journals.
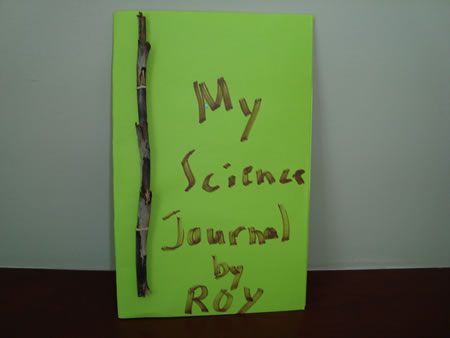
*Make stick books for recording science observations. First children will need to find a stick that is about as long as their foot. Next fold 2-5 sheets of paper in half. Punch holes about 2 inches from the top and bottom of the book near the crease as shown. Take a rubber band and push it through one hole. Insert the stick through the loop. Take the other end of the rubber band and put it through the other hole and extend the other end of the stick through that loop. Taadaa! A stick book!
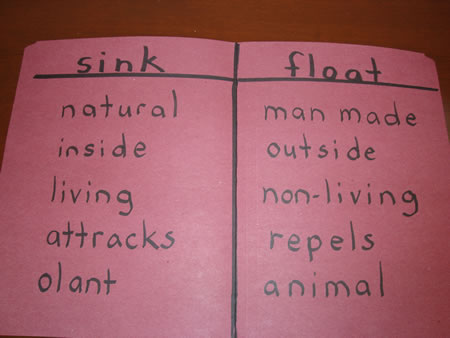
*Make a T-chart on a file folder or piece of poster board. Children can use this for sorting real objects or pictures. For example, you can put out a tub of water and an assortment of classroom objects and toys. Children can take each item and predict whether it will float or sink. After placing the object in the tub, they can then put it in the correct category. You can do a similar activity with a magnet and objects that the magnet attracts or repels. Objects that are natural and manmade can also be sorted, as can pictures of items that are found inside or outside, things that come before and after, etc.
*Take discovery walks on your playground. One day, explain to the children that you want them to use their ears and try and remember all the things that they hear. Make a list when you return to the classroom. Another day they could use their eyes and try to remember everything that they see. You could also take a touch walk where children explore the way different objects feel. (Think of all the vocabulary words that you could introduce!)
*Ask children to collect different leaves, sticks, or rocks on a nature walk. When you return to the classroom, challenge the children to sort what they have found. Can they sort it in a different way? Be sure and return the objects to where you found them after you have finished sorting them.
Hint! Tell children that they can only collect things that are on the ground. Never pull leaves, flowers, or sticks off a tree. We don’t want to hurt our fellow living creatures!
*Rock bonding will help increase observation skills. First, each child will need to find a rock on the playground. Have each child hold his rocks and describe what is unique about it. Then, place all of the rocks in a basket. Challenge each child to find her special rock in the basket.
|


