Marvelous Magnetic Letters!
Letter Play - Let children play with magnetic letters on a cookie
sheet or file cabinet.
Hint! You can also put small magnetic letters in a candy/mint tin
and let children make words on the lid!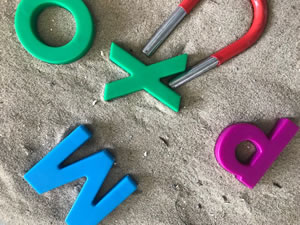
Sand Box Treasure- Hide magnetic letters in your sand table.
Children can take a magnet and try to identify letters they
“attract.”
Letter Password - Place several letters you are working on around your door frame. As children leave the room, ask them to touch a particular letter. (You could also ask them to touch the
letter they hear at the beginning of particular word.)
Letter Match Up - Create a class alphabet book by having
children draw pictures for each letter. Place an outline of the
magnetic letter at the top of the appropriate page. Children take
the real letters and match them up to the outline in the book.
Letter Hunt - Hide letters in the classroom. Children will love to
go on a “letter hunt.” Can they identify the letters they find?
Can they make a word with the letters they find?
Touch and Tell - Place a magnetic letter in a sock. Can children
reach in the sock and identify the letter by feeling it?
Building Words - Demonstrate how to build words with magnetic
letters.
 Letter Pops
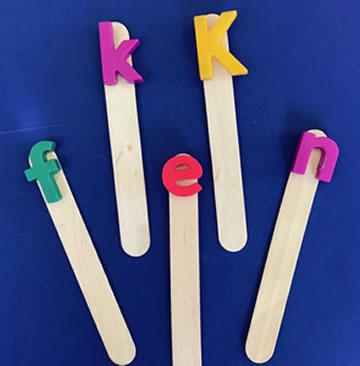
You will need a set of magnetic letters and jumbo craft sticks to make your letter pops. Glue the letters to the craft sticks with a strong glue (such as E6000). Pass these out to the children to hold up as you sing alphabet songs.
*Have them match up their letter to classroom print or letters in books.
*Make a set with uppercase letters and lowercase letters. Pass these out and then challenge children to find their match.
*Put letter pops together to make words.
Letter Tree
After reading CHICKA CHICKA BOOM BOOM by Bill Martin, Jr. and John Archambault you can make your own letter tree. You will need the following materials: large empty coffee can or vegetable can, brown or gold spray paint, green felt (2 or 3 colors of green and a small piece of brown), magnetic strip, craft glue, magnetic letters. 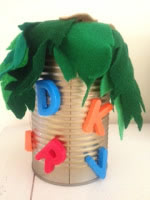 First, spray paint the can gold or brown. Next, cut out 9 palm fronds from felt using the attached pattern. Glue the palms as shown and then cut out several coconuts from the brown felt and glue on top. Attach a magnetic strip to the bottom of the palms. Turn the can upside down and place the palms on top to create a tree. Attach the magnetic letters to the side of the can. Ask children to place the letters in their name on the tree; attach the letters they can recognize; put up the letters that are all the same color; make words, etc. When they are finished playing with the tree, they simply turn the can over and place the palms and letters in the can.
Play Dough Letters
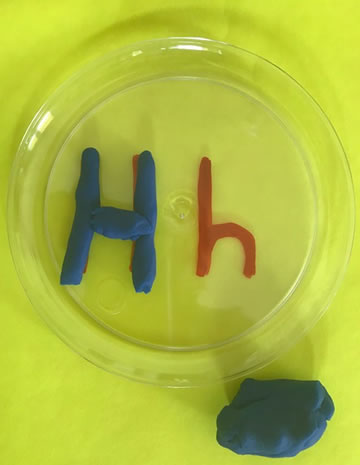
Write letters on clear plastic plates, plastic placemats, sheet protectors, or leftover laminating film with a permanent marker. Make play dough from the recipe below. Children roll play dough and place it on top to make the letter. Can they make objects that begin with that sound?
Homemade Play Dough
2 cups flour
2 cups
2 TB cream of tartar
2 TB vegetable oil
2 cups water
Food coloring
Mix ingredients together in a pan until smooth. Cook over medium heat, stirring constantly until the mixture forms a ball and sticks to the spoon. Cool and knead. Store in zip baggie
*Substitute baby oil or aroma therapy oil for the vegetable oil. You can also add unsweetened Kool-aid, vanilla, cinnamon, or other spices to give it an aroma.
Feel, Taste, and Touch!
Senses are like pathways to the brain. The more senses you activate, the more likely the message is going to get there. And through repetition, the message is going to stay there!
Photo Sheets – Make letters with dots on a photo sheet. Connect the dots with a marker, Wikki Sticks, or other materials.
*Children can also outline letters with dry beans, counting bears, shells, buttons, and other manipulatives.
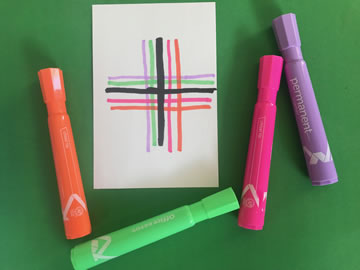 Rainbow Writing- Make “rainbow letters” by tracing around letters with different colors of crayons.
Hint! Make giant rainbow letters using bulletin board paper on the wall.
Scratch and Sniff- Write letters with glue, then sprinkle with Jell-o or powdered drink mix. Dry, scratch, and sniff!
Hint! Each child will need his/her OWN!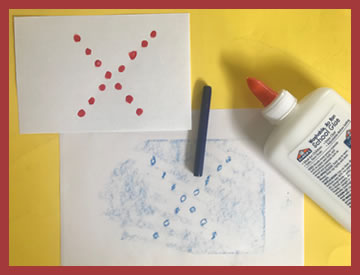
Lotty Dotty- Use a marker to make dotted letters. Put a drop of glue on top of each dot. Children trace over the dots of glue with their finger as they make the sound.
Rub Overs - Write letters with water soluble makers. Trace over the letters with white glue. The marker will be absorbed into the glue to create a raised letter. Children place a sheet of paper on top and rub with the side of a crayon. Taa daa!
*You can also make invisible letters by just using glue. Children rub over the letter to discover what it is.
Hint! You may need to tape these to a table or use with a clip board to keep them in place.
Magic Paint Brush – Give children a clean paint brush and a cup of water. Children make letters on a chalkboard and then watch them disappear!
Hint! Place a small piece of sponge in a spring clothespin and use as a paintbrush.
Mystery Letter - Write letters with a white crayon. Children take a large paint brush and diluted paint and “wash” over the entire page to make the letter appear.
Pretzel ABC’s - Give children pretzel sticks and pretzel twists. Have them nibble the pretzels to make letters.
Squirt and Eat - Use squirt cheese to make letters on crackers. Lick the letters with your tongue. (Squirt icing also works on sugar cookies.)
Alphabet Cereal, Crackers, and Pretzels - Letter shaped snack foods can be used for identifying letters, making words, or eating!
Letter Pasta – Purchase pasta/macaroni in the shape of alphabet letters. Separate the pasta into four plastic bags. Add a tablespoon of rubbing alcohol and a large squirt of food coloring to each bag. Shake. Dry on wax paper. Mix the colors together to get a rainbow of letters. Children
can “find” letters with a magnifying glass. Or, give them tweezers to pick out letters they know.
Letter Transfer - Have children move foam letters from one plate to another plate with tongs.
Hint! You can also have children move plastic letters from one bowl to another with a spoon.
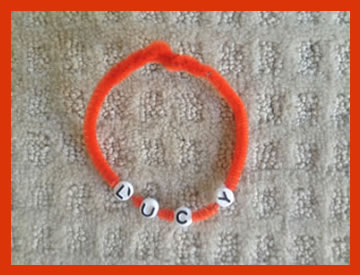
Letter Beads – Let children string plastic beads on a pipe cleaner to make a bracelet. They could spell out their name or other special words.
Stencils – Give children letter stencils to trace around on construction paper. Children can cut out the letters after they’ve traced around them.
Hint! They can also make a letter necklace by punching holes in the letters they’ve cut out and stringing them on yarn.
Alphabet Books from A to Z
The Alphabet in My Mouth -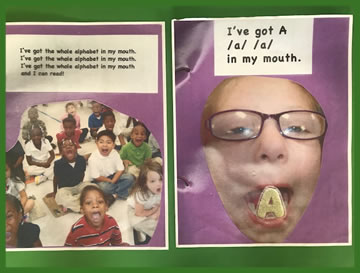 Use the words to “I’ve Got the Alphabet in My Mouth” to make this book. First, take a close up digital photo of each child with their mouth wide open. Next, cut letters out of construction paper and glue to the tongue on their picture. Write words for each page to go with the picture, such as “I’ve got D /d//d/ in my mouth.”
Hint! Use the principal, school secretary and other helpers if you need more mouths.

Alpha-Body Book - Let children make letters with their bodies. Divide children into groups of 3 or 4 and let them lay on the floor to create different letters. Take pictures. Put the letters together to make a book.
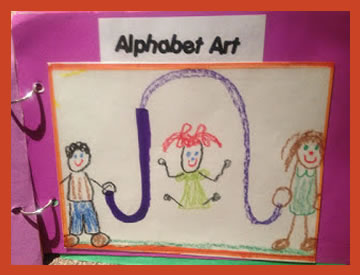
Letter Art- Write large letters of thealphabet on paper. Give each child a letter and challenge them to create a picture around their letter. “What does your letter look like? Does it remind you of something? Can you use your crayons to turn it into that object?”
Eat from A to Z- Assign each child a letter of the alphabet and a day to bring snack. On her day she should bring a food that begins with her sound. For example: A/apples, B/bananas, C/carrots, D/dill pickles, etc.
*Take a photograph of the child with her snack and make an ABC book for your classroom similar to the one below.
Themes - Make alphabet books that relate to different themes, seasons, holidays, or concepts you are working on. For example:
Pets Foods We Like
Insects Friends Oceans
Transportation Scary Things Sparkle Words
Things We Love ABC’s of Spring Our Country
*You could also involve families in making an alphabet book. Give each family a sheet of paper with a letter on it. Have them cut out words or pictures of things that begin with the letter. Put their pages together to make a book for your class.

 Letter Pops
  First, spray paint the can gold or brown. Next, cut out 9 palm fronds from felt using the attached pattern. Glue the palms as shown and then cut out several coconuts from the brown felt and glue on top. Attach a magnetic strip to the bottom of the palms. Turn the can upside down and place the palms on top to create a tree. Attach the magnetic letters to the side of the can. Ask children to place the letters in their name on the tree; attach the letters they can recognize; put up the letters that are all the same color; make words, etc. When they are finished playing with the tree, they simply turn the can over and place the palms and letters in the can.
  Rainbow Writing- Make “rainbow letters” by tracing around letters with different colors of crayons.
 Use the words to “I’ve Got the Alphabet in My Mouth” to make this book. First, take a close up digital photo of each child with their mouth wide open. Next, cut letters out of construction paper and glue to the tongue on their picture. Write words for each page to go with the picture, such as “I’ve got D /d//d/ in my mouth.”


