Back to Back - Children stand in a circle and then turn right so they are all
facing in the same direction. The teacher begins by making a letter,
shape, numeral, etc. on the first child’s back. The first child draws the same thing on the second child’s back. Continue around the circle as every has a turn.
Hint! Give verbal directions for what you are doing as you draw on the back. For example: I’m making a vertical stroke and then a horizontal stroke to make the letter t.”
Mystery Stroke – Divide children into pairs. One child is the “writer” and the other child is the “receiver.” The “writer” makes a line, shape, letter, etc. on the “receiver’s” back. When the receiver guesses correctly they exchange places.
PENCIL POWER
*Kindergarten teachers say, “Please tell the pre-k teachers to teach their children how to hold their pencil correctly.” First grade teachers say, “Please tell the kindergarten teachers to teach their children how to hold their pencil correctly.” The bottom line is that it’s difficult to correct pencil grip once it’s imprinted the wrong way. Here are lots of tips that just might help!
Seatbelt - Have children put a silly band (or pony tail band) around the
wrist of the hand they write with. Explain, “When you go in the car you put a seatbelt on. When you write, you need to put a seatbelt on your pencil. (Hold the pencil and loop the silly band around it.) Now, mom and dad are in the front seat and the kids are in the back seat.” It’s amazing how much more control children will have with their writing instrument with this technique!
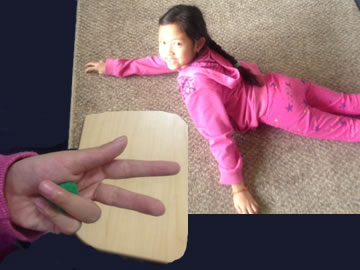
Pompom - Give children a pompom or cotton ball to hold in their
hand when they write. Demonstrate how to put pinky and ring man to “sleep” on the pompom before picking up the pencil.
Bird’s Beak - Point the pencil away from you. Make a bird’s beak by
opening and closing your index finger and thumb. Use your beak to pick up the point of the pencil and then flip it back.
Writing Bracelet - String a bead or jingle bell on a piece of yarn or string to make a bracelet. Make it loose enough so it can slide easily on and off a child’s wrist. While writing the child wears the bracelet and holds the bead in her hand.
Pencil Grip - You can purchase pencil grips or simply wrap a rubber band several times around the end of a pencil.
Next Page