November 2014
For the Love of Art
A-Alphabet Art
Materials: crayons, paper
Directions: Draw a large letter in the middle of the paper. Turn the paper all around.
What object, animal, person, or place does it look like? Use crayons to
“camouflage” the letter to make it look like something.
 Adaptations: Challenge children to create an object out of the letter that begins with that
sound.
Adaptations: Challenge children to create an object out of the letter that begins with that
sound.
Tie in with units of study or seasonal themes. For example: make
something out of “100” for the “Hundred Day Celebration,” or make
something out of a shamrock on St. Patrick’s Day.
More! Cut apples in half diagonally and do apple prints for A.
B- Bubble Painting
Materials: mixing bowl, dish detergent (Joy), straw, water, food color, paper
Directions: Put 1 cup of water in the bowl. Add a squirt of dish 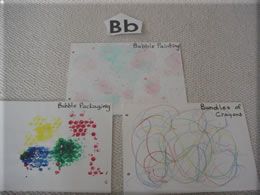 detergent.
Take a straw and blow bubbles in the bowl. When the bubbles start
overflowing, squirt drops of food coloring on the top of the bubbles, and
then lay the paper on top. The bubbles will pop and create a design.
detergent.
Take a straw and blow bubbles in the bowl. When the bubbles start
overflowing, squirt drops of food coloring on the top of the bubbles, and
then lay the paper on top. The bubbles will pop and create a design.
More! Make crayon bundles for B. Wrap a rubber band around 3 or 4 crayons
and draw designs on a sheet of paper.
You can also do bubble wrap prints for B. Paint on bubble wrap, and then
lay a sheet of paper on top and rub to make a design.
C- Complete the Picture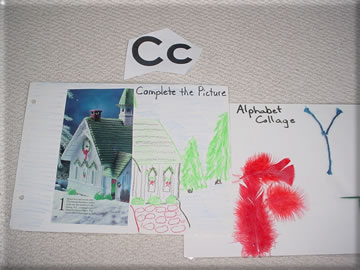
Materials: crayons, paper, glue, old magazines
Directions: Cut out pictures of large objects from magazines. Next, cut the objects
in half. Glue one of the halves to one side of a sheet of paper. Now, complete the picture by coloring the missing half with crayons.
Adaptations: Use markers instead of crayons
More! Collages from cotton and other media can also be used for C.
D- Dirt Painting
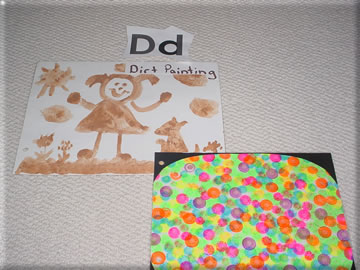
Materials: dirt, water, plastic container, brushes, paper
Directions: Mix the dirt with water to make a thick liquid. Paint a picture with
brushes or with fingers.
Adaptations: Look for different types of soil to create different shades of “dirt”
paint.
More! Make dot designs for D.
E- Eye Dropper Painting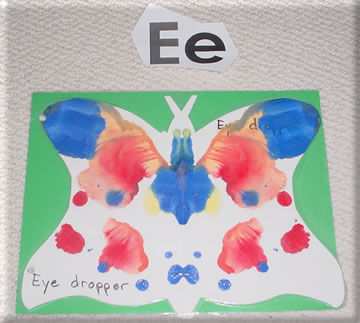
Materials: paint, paper, eye droppers
Directions: Fold a sheet of paper in half. Drop several colors of paint on the
paper with the eye droppers (or spoons). Fold in half and rub to make
the colors “squish” together.
Adaptations: Cut a large butterfly shape out of paper and use this technique
to decorate it.
Drizzle paint on one sheet of paper. Put a second sheet on top and
roll over the surface with a rolling pin.
F – Finger Painting
Materials: finger paint, finger paint paper, water, sponge
Directions: Wet the paper with a sponge. Put a heaping tablespoon of paint on
the paper. Make designs with fingers, knuckles, fists, etc.
Let children finger paint on a plastic lunchroom tray. Lay the paper
on top, press, lift, and you will have the finger paint design.
Adaptations: Cut the paper into seasonal shapes or designs. 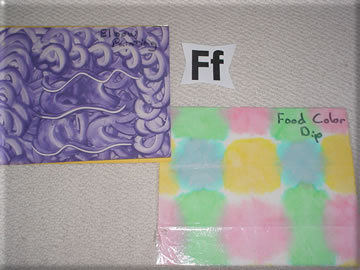
Use two primary colors so children can mix to make a secondary color.
Make your own finger paint by adding dry tempera to liquid starch.
Finger paint with instant chocolate pudding.
Finger paint with shaving cream on tables and desks.
More! Do food color dip for F. Take a paper towel and fold it into a small
square. Take 4 small cups and put water and a few drops of food
coloring in each cup. Dip each corner of the paper towel into a
different color. Open and dry.
G - Glue Globs
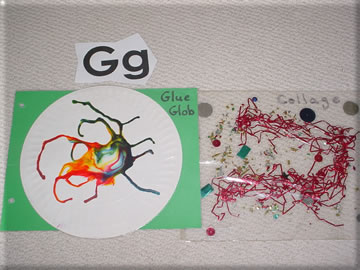
Materials: school glue, food coloring, paper plates
Directions: Squirt a glob (2 Tb.) of glue in the middle of the paper plate.
Add a drop of red, yellow, and blue food coloring in different
corners of the glob. Move the plate slowly around to create
new colors and designs with the glue. Dry.
More! Make a glittery collage for G.
H- Hand Dancing
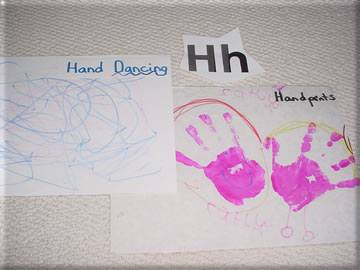
Materials: crayons, paper, music
Directions: Hold a crayon in each hand. Put on some music, and let the crayons
“dance” on the paper.
Adaptations: You can do a similar activity with a small group of children. Put a large
sheet of butcher paper on the floor. Have children lay on their
tummies and dance magic markers on the paper. Play different styles of
music and have children describe how the music makes their crayons
“dance” in different ways.
More! Make handprint designs for H.
I – Ice Cube Painting
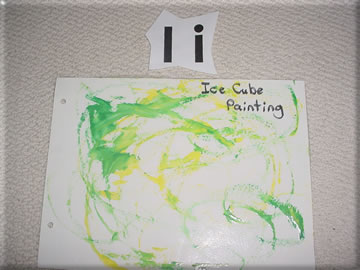
Materials: plastic ice cube tray, paint, craft sticks, paper
Directions: Pour paint in ice cube trays and insert a craft stick in each section. Freeze.
Pop the “paint cubes” out of the tray and swirl around on the paper. As the
paint melts, it will create a design.
Adaptations: Make similar ice cubes with water and liquid water color.
Hint! This is fun to do outside on a hot day!
J – Junk Painting
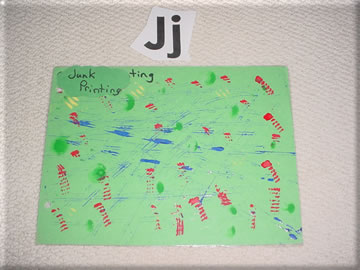
Materials: spools, kitchen utensils, plastic animals, and other gadgets with
interesting textures, paint, paper plates, paper
Directions: Pour a little paint in the paper plates. Dip “junk” in the paint and print on the paper. Dip the feet of toy animals in the paint and let them “walk”
across the page.
Adaptations: Ask children to bring in “junk” from home for this project.
K- Kisses Collage
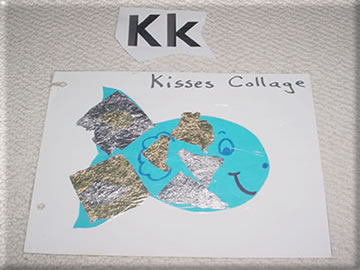
Materials: chocolate kisses, glue, paper, crayons
Directions: Invite children to eat the chocolate kisses and then create a collage
out of the wrappers.
Adaptations: What a great way to follow up THE RAINBOW FISH.
L – Little to Large
Materials: crayons, paper
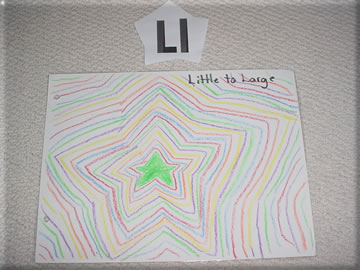
Directions: Make a very small shape or object in the center of the paper. Take a different color of crayon and go around it, making it a little larger. Continue using different colors of crayons and making the object a little larger until it completely fills the page.
Adaptations: Use seasonal objects, such as hearts, kites, leaves, etc.
Next Page